
Cisco SPA122 Setup Guide
To get your new Cisco device up and running with 2talk you will need the following before you start:
Step One
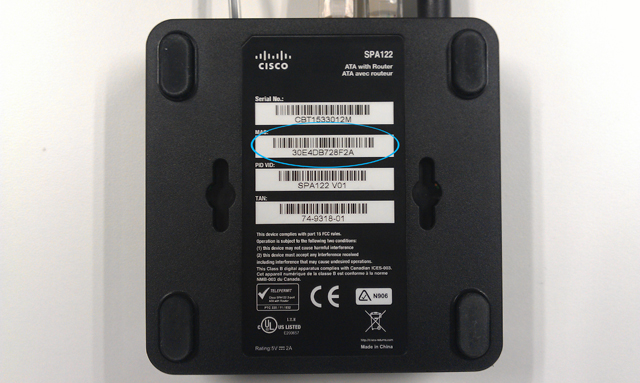
Locate the MAC address of your Cisco device and note it down. It can be found on the underside of the device.
Step Two
Step Three
You will need to set up your device so that it is connected to the Internet for download of the 2talk Configuration. As part of this you will be required to Factory Reset your device.
Plug your Cisco SPA122 power supply into the device and then into your power supply
Step Four
Plug your Analogue Phone into the Phone 1 port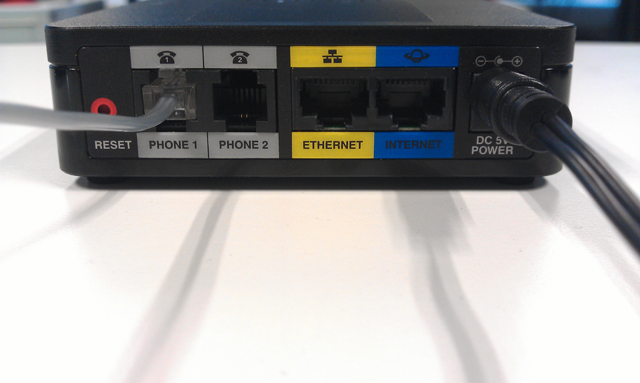
Step Five
Plug one end of the first Ethernet cable into the port labeled Ethernet and the other into the Ethernet port on your laptop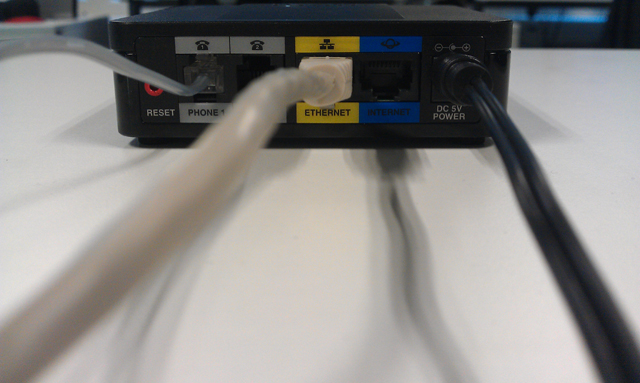
Step Six
Plug one end of the 2nd Ethernet cable into the port labeled Internet and the other into a spare Ethernet port on your DSL/Internet Modem
Step Seven
Pick up your phone handset:
Now wait for around 10 seconds for the unit to reset.
Your device is now ready to be loaded with your 2talk account settings.
Step Eight

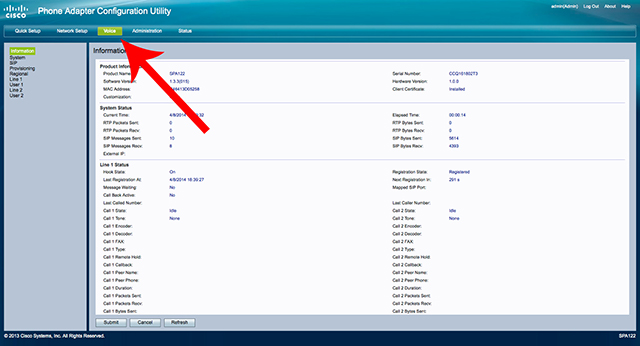

Please now paste in the profile rule field the following link:
https://cprov.2talk.co.nz/linksys/$MA/spa1xx.cfg
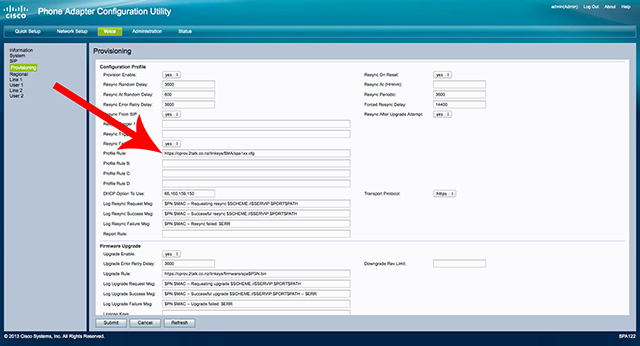
Thats it, now save and restart your device and it should download it's configuration and be configured with your phone numbers.
NOTE: Once auto-provisioned your device will be assigned a password for 'admin' access to the web interface. The password is the same as your 8 digit 2talk account number (see Account Details page if you are unsure what this is).
Still having problems?
Please log a support ticket in 2talk live and our support team will assist you.